Event Management Guide Contents
- RSVP Form and Thank You Page
- Who does what?
- Necessary fields and CASL considerations
- Using the Landing Page builder
- Automatic RSVP List Generation
- Automated Confirmation Email
- Invitation Email Campaign: Linking to your RSVP form
- Automated Reminder Email Campaigns: RSVPs vs. Non-RSVPs
- Thank You For Attending Email Campaign: Suppressing those that did not attend
RSVP Form and Thank You Page
Who does what?
If the RSVP form has already been developed and is hosted by your team, generate an Action URL to be placed on the form tag within the action attribute. This can be done by your website developer.
OR
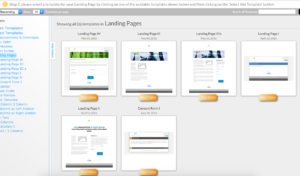
You can use the Landing Page builder within itracMarketer to develop your RSVP form and Thank You page. To access this feature, click the Landing Page tile on the Home Dashboard.
Necessary fields and CASL considerations
Fields to include in an RSVP form:
- First Name
- Last Name
- Email (Required) – The email address is the unique identifier to ensure that the correct iProfile is updated. This field must be required.
- Number of Guests
CASL Considerations:
You cannot make providing consent mandatory in order to submit an RSVP. You can include the option to provide consent in the RSVP form as long as it is not a mandatory field. If you are including an Opt-in request, you must ensure that contacts are aware of what type of communications they will receive, the company they will receive the communications from, and that they have the ability to unsubscribe at any time. It is also necessary to have the corporate contact information on the page.
Using the Landing Page builder
Follow these directions to create your Landing Page.
Automatic RSVP List Generation
To ensure your RSVP’s feed onto a list, create an empty contact list from the My Lists page and setup a workflow to add those contacts that have completed the form to that list. The workflow builder can be accessed underneath the landing page.
Automated Confirmation Email
If you would like to send an automatic RSVP confirmation email to contacts once they have submitted the form, create a confirmation email template in the Design or View a Template section of the Email Campaigns page.
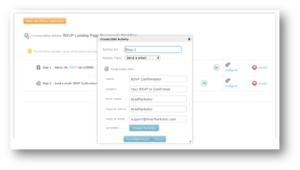
Then add an activity to the workflow from the previous page to send an email once someone completes the form, using the template that you have created.
Invitation Email Campaign: Linking to your RSVP form
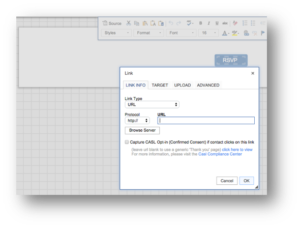
To obtain the link to your RSVP form, click the Promote button under your landing page. If it has already been promoted, click get link. Hyperlink a button or text in your invitation email campaign with this URL.


Automated Reminder Email Campaigns: RSVPs vs. Non RSVPs
Do you want to send out a reminder about the event to those that have RSVP’d? Do you want to send a reminder to RSVP for those that have not done so yet? How about both?
The first step is to create the email templates in the Design or View a Template section of the Email Campaigns page. You will want to include the link to the RSVP form in the campaign that is going out to those that have not yet RSVP’d.
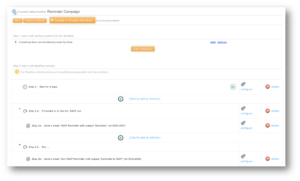
The next step is to create a new workflow. This workflow must be separate from the previous one because the starting conditions will be different and must be setup after your invitation campaign has been deployed because the starting condition involves that campaign. This new workflow should be set up from the automation page as follows:
- Condition Type: Email – Contact has been sent a specific email on account (select the account the invitation campaign was sent from then select your invitation campaign)
- Activity Type: Wait – specify how long the system should wait before sending the reminder campaigns
- Activity Type: If Else Condition
- Condition Type: List – Contact in account (select the account your RSVP list is in) on list (select your RSVP list)
- If Activity Type – Send a email (specify the details for your reminder campaign to those that have RSVP’d)
- Else Activity Type – Send a email (specify the details for your reminder campaign to those that have not RSVP’d)
Thank You For Attending Email Campaign: Suppressing those that did not attend
If you wish to send out a “Thank you for attending” email campaign, be sure to take note of all of the individuals that actually attended your event. You can export your RSVP list to MS Excel and either print it to check off guests as they arrive or do it right on your computer. You will then know which contacts to send your thank you campaign to.


