An iProfile is created for every email address that is entered into the database. It contains all of the details associated with that email address including contact information, the history of interactions and much more.
The iProfile icon can be used to view and edit information on each contact. It can be clicked on from any contact list.
Clicking the icon will open the following page.
The orange buttons at the top of the page are where items such as Notes, Tasks, History, Emails, Deals, Outlook Emails, Events, Files etc. associated with the contact can be viewed and edited. To edit the Contact Details, click on the ![]() icon and then type into the fields. Choose the check mark to accept the changes made.
icon and then type into the fields. Choose the check mark to accept the changes made.

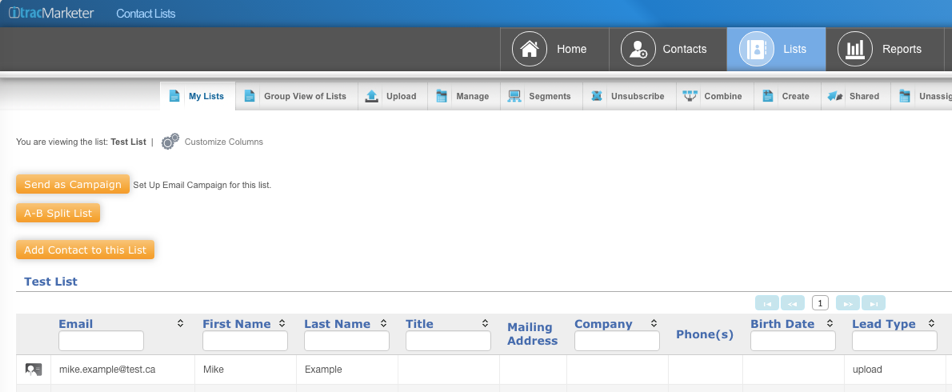
The centre page is the main contact sheet for the customer. Any information captured either within a list or a form is automatically added to this part of the contact sheet when it is uploaded to the database. It is fully editable so you can go in at any time to add or edit these details by clicking on the pencil icon.
The lead source is how did this person hear about you/the project they registered for etc.
The Original lead source is how this person initially became part of the iTrac database.
Lead type is the mode in which they are entered into the database and includes options like walk-in, webreg, phone-in etc.
Entered is the date they were entered into the database
Modified is the date they were last active i.e. filled out a form, opened an email
The CASL Opt-In Status is an extremely important part of the iProfile as it ensures you always remain CASL compliant. It is fully editable and can be updated as and when a client’s status changes.
Upon clicking the view/edit details link, the page that pops up will look familiar to that when you upload the contacts through a list, as you would have been given the option to tag them at the time you uploaded them to the database.
Below their status you can see who tagged them & when they were tagged. Some contacts have more than one tag if they were uploaded more than once. Please note that the Express consent will always override implied consent.
The Custom fields section allows you to view any custom attributes that may have been captured on a form and would include information over and above the regular contact details. Real Estate for example may want to pull custom fields that capture how many bedrooms or bathrooms a potential customer may want in a home. So that information would populate here.

The orange tabs just above the contact sheet are really helpful at keeping you organized with each contact.
The Notes and Task tab allows you to keep track of when to follow-up with a customer and document any notes pertaining to them specifically.
The History tab will give you a full history of each client’s activity all the way back to the day they were first entered into the database.
The Emails tab pulls up all emails that were sent to this email address, as well as all the activity that occurred pertaining to each email such as opens or clicks etc.
The Deals tab is for clients using the system as a CRM and would help you keep track of any deals you are trying to close with each specific customer.
The Outlook Emails allows you to send emails to the client directly. Only certain accountholders will have the ability to send 1-to-1 emails via itrac.
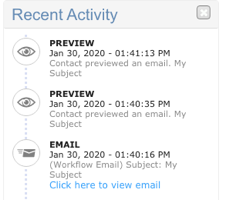
The right hand pane is titled Recent Activity which gives you a quick snapshot of the history tab showing any activity that the contact has engaged in within the last couple of months.
The left hand pane pertains to a contacts Score and Rankings.
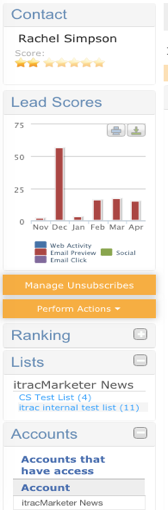
You are able to attach a star score to each of your contacts, as well as a lead score to each activity.
Customers have the ability to opt out of certain campaigns or communication types at any time, so by clicking this button ![]() , you can manage their unsubscribes.
, you can manage their unsubscribes.
It is important to make sure the global unsubscribe is checked. If it’s left unchecked, the contact will not receive any emails from you at all.

The Perform Actions button allows you to manage contacts iProfiles such as Removing from the account, printing the iProfile etc. if you require a hard copy.
The Ranking section is linked to the lead score and shows you how a contact ranks. If there are any duplicate contacts or email templates linked to this contact, it will be shown here.
If you see the same contact has multiple iProfiles, this is the place you would go to clean it up and merge them. Itrac is set up in such a way that even if the same email address is in the system multiple times, they will never receive duplicate emails.
The Lists section shows you which lists the contact is captured in, and allows you to go directly to any of these lists from here. And the Accounts section shows you which accounts have access to this content.
Top Navigation section

A contact can exist in multiple lists, so you can add them or remove them from a particular lists with the help of the Move Contacts tab.
The Edit Contact tab allows you to add additional info to the contact card.
Add Note tab allows you to document any notes pertaining to them specifically.
Schedule Task tab allows you to keep track of when to follow up with a customer
Send Emails pertains to one-to-one emails sent directly through the iTrac System. It allows you to edit the content just like any other email editor. But you can also add a template from the iTrac database to fancy up the look of a one-to-one email.
Ranking is linked to your contacts lead score which is editable.
Have you got additional questions about the iProfile feature in itracMarketer? Then, Contact us today. Our customer success team will be happy to assist you!