The purpose of creating a landing page is to generate leads, which can assist you in collecting information about your audience. This article will explain how to create a landing page within itracMarketer.
Step 1: Navigate to the Home Dashboard
Step 2: Click the Landing Page tile

Step 3: Click the Create button.
Step 4: Enter the Name, Description and Start Date in the text boxes provided. The End Date and Budget fields are optional.
Step 5: Click the Next button.
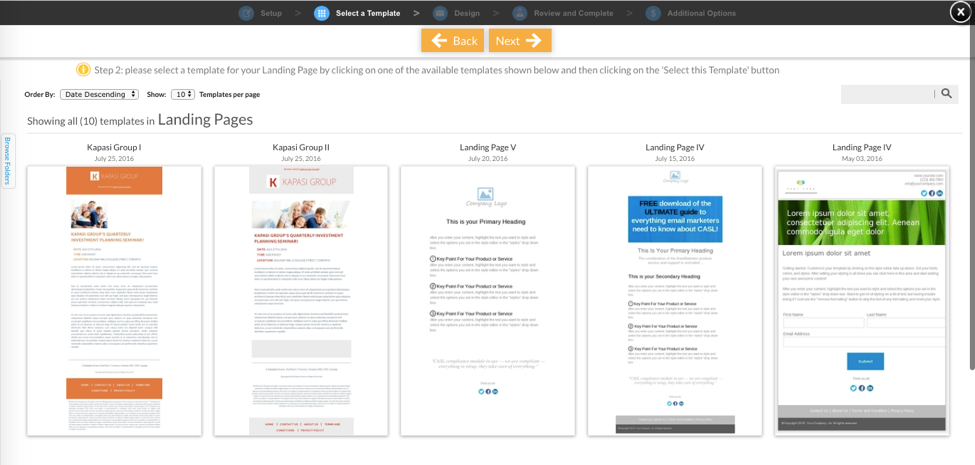
Step 6: Hover over the desired Landing Page template and click Select this template.
Note: If a blank template is desired, it is suggested to use the Blank Template in the Themed Templates folder. This template will enable the use of the drag and drop components. Copy the template to edit as desired.
Step 7: Edit the template as desired. Hovering over a Component on the template will display the options to edit, move, duplicate, style and delete the Component
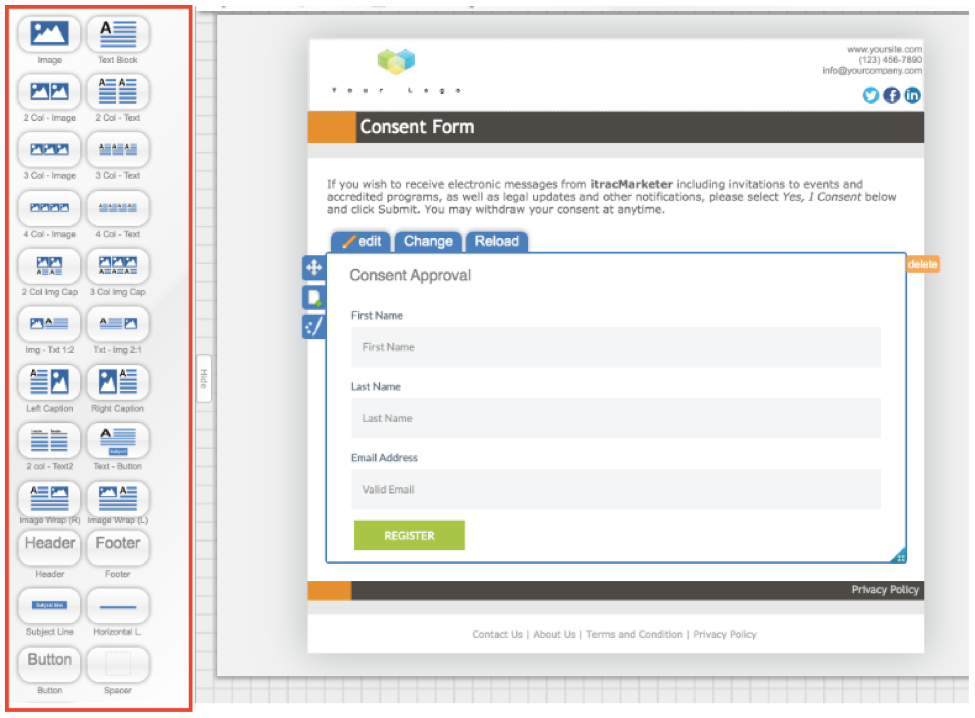
To add a Web Form onto the Landing Page:
Drag and drop the Form Component onto the Landing Page. Click the Click to Configure link on the Form Component.
Select Copy or use an existing Form to insert one created in the Web Form tile.
OR
Select Create a new Form to create one specifically for this Landing Page.
To edit the Form:
- Hover over the Component on the template and click the Edit
- Drag and drop the desired Available Fields onto the template or click the Create new Custom Field
- Select whether the field is Required and if so, edit the Message to be displayed if a contact tries to submit the form without entering a value in that field.
- To remove Fields from the form, click the remove icon to the left of the field.
- To edit the wording of the Submit Button, click the pencil icon to the right of the button, enter the appropriate text and click the checkmark button.
- When the Form is complete, click the Save
Step 8: Click the Configure Thank You Page button to edit the Thank You Page template. (optional)
Step 9: Click the Next button.
Step 10: Click the Confirm Landing Page button.
Step 11: Click the Add a new Workflow to the Landing Page link.
Step 12: Click the (Click to add and Activity) icon.
Step 13: Enter an Activity Id in the text box provided.
Step 14: Select an Activity Type from the dropdown menu.
Note: If the If/Else Condition Activity Type is selected, a Condition can be specified to apply to the following activities.
Step 15: Select/Enter the appropriate values for the following fields. The fields will change depending on the Activity Type.
Step 16: Click the Save/Add Activity button.
Step 17: Repeat steps 12 through 16 until all the activities are added.
Step 18: Under the Promote your Landing Page link. Selected, select the channel to promote the link to the Landing Page.