Follow these steps to make data transfer properly between itracMarketer and Salesforce.
Salesforce.com itracMarketer Setup
a) Ensure that your itracMarketer tracking code is placed on the back end of every page of your website.
This code is provided by your itracMarketer Account Manager during onboarding or can be requested from them at any time. The tracking code can be implemented by your web developer.
b) Setup The Campaigns Page
Step 1: Log into Salesforce and click the Setup link at the top right of the screen.

Step 2: On the left hand side, click Customize under the Build menu, and then click Campaigns.
Step 3: Click Page Layout under Campaigns.

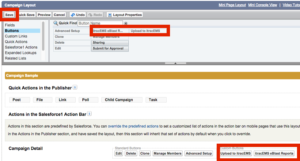
Step 4: Select Buttons from the left menu of the Campaign Layout page.
Step 5: Drag and drop the Upload to itracEMS and itracEMS eBlast Reports buttons to the Custom Buttons section of Campaign Detail.
Step 6: Click Save.
c) Setup the Leads Page
Step 1: Click the Setup link at the top right of the screen.

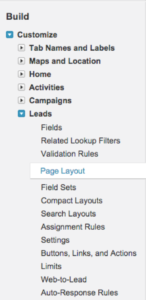
Step 2: On the left hand side, click the Customize link under the Build menu, and then click Leads.
Step 3: Click Page Layout under Leads.
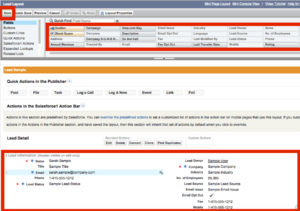
Step 4: Select Fields from the left menu of the Lead Layout page.
Step 5: Drag and drop the following fields into the Lead Detail section:
Title, Email, Company, Phone, Fax, Mobile Phone, Lead Source, Email Issue, and Email Opt Out.
Step 6: Click Save.
d) Setup The Contacts Page
Step 1: Click the Setup link at the top right of the screen.

Step 2: On the left hand side, click the Customize link under the Build menu, and then click Contacts.
Step 3: Click Page Layout under Contacts.
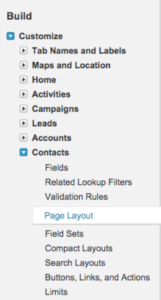
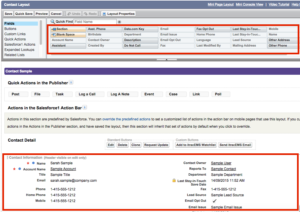
Step 4: Select Fields from the left menu of the Contact Layout page.
Step 5: Drag and drop the following fields into the Contact Detail section:
Title, Email, Phone, Fax, Mobile Phone, Lead Source, Email Issue, and Email Opt Out.
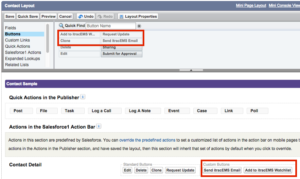
Step 6: Select Buttons from the left menu of the Contact Layout page.
Step 7: Drag and drop the Send itracEMS Email and Add to itracEMS Watchlist buttons to the Custom Buttons section of Contact Detail.
Step 8: Select Related Lists from the left menu of the Contact Layout page.
Step 9: Drag and drop itracMEDIA Emails sent, itracMEDIA Web Activity, and itracMEDIA History into the Related Lists section.
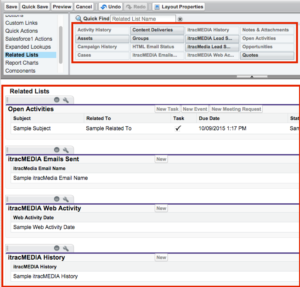
Step 10: Click the wrench icon beside each of the Related Lists that were just dragged and dropped into the Related Lists section in order to add in the following Selected Fields:
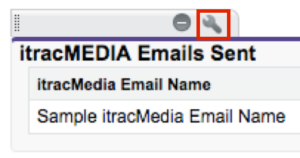
| Related List | Selected Fields |
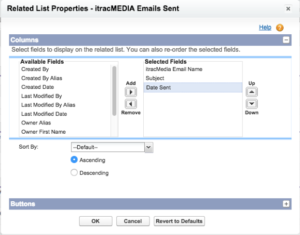
| itracMEDIA Emails Sent | itracMEDIA Email Name, Subject, Date Sent |
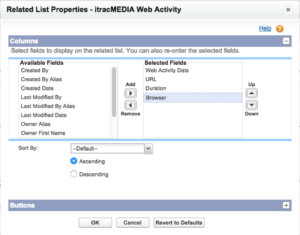
| itracMEDIA Web Activity | Web Activity Date, URL, Duration, Browser |
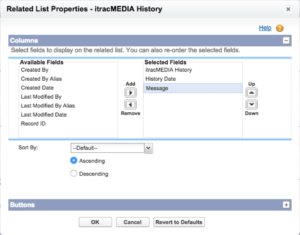
| itracMEDIA History | itracMEDIA History, History Date, Message |
Step 11: Select the desired fields from the Available fields, and then click the Add button to move them to the Selected Fields.
Step 12: Click OK.
Repeat steps 10-12 for itracMEDIA Emails sent, itracMEDIA Web Activity, and itracMEDIA History.
Step 13: Click Save.

e) Add the itracDashboard and other itracMarketer tabs.
Step 1: Click the addition sign on the top navigation bar.
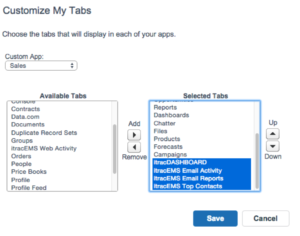
Step 2: Click Customize My Tabs.

Step 3: Select the following tabs from the Available Tabs and then click the Add button to move them to the Selected Tabs.
itracDASHBOARD
itracEMS Email Activity
itracEMS Email Reports
itracEMS Top Contacts
Step 4: Click Save.
Note: To view additional tabs that do not fit on the main navigation bar, click the downward arrow at the left side of the navigation bar.


