Navigate to the CASL Compliance Centre on your Home Dashboard. Here is where you can configure the CASL Consent statuses of both your contacts and contact lists.

Read: Tag An Entire Contact List
Read: Tag An Individual Contact
Additionally, we have pre-set workflows for CASL.
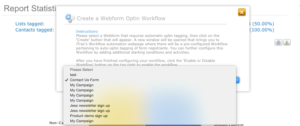
Read: Create a Webform Optin Workflow
The Web form Optin Workflow can be added to any existing web form. Choose an existing web form from the drop down menu. By selecting a form, you are signing that any contact who registers on the selected form will enter the Webform Optin Workflow.

Now select Create a Webform Optin Workflow.
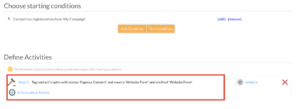
Here, you will be able to configure the workflow Conditions and Activities. You’ll notice the Activity has already been pre-set. It signifies that the contact will be tagged with Express Consent status and the source and method will be tagged Website form.

When both Conditions and Activities are set up, all that’s left to do is enable the workflow to run. To do this, select Enable.

Read: Create an Optin Expiration Renewal Workflow
The second pre-set workflow can be set up to convert a contact’s Implied Consent expiring ahead of time. Implied Consent status expires within 2 years of entering your database.
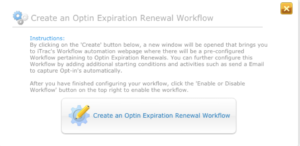
Select Create an Optin Expiration Renewal Workflow.

Here, you’ll notice two conditions have been pre-set. First, the contact’s CASL status is Implied Consent. The second condition indicates that the contact’s optin expires in less than 90 days. You can edit the condition to customize it to a timeframe you desire.

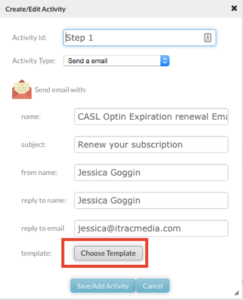
Next, define your workflow activities. You’ll notice that workflow has been pre-set for you however you can configure it. It signifies that an email will be sent with the subject “Renew your subscription.”

To configure these settings, select configure.
Select Choose Template to customize the email template.

Choose Save/Add Activity when done.
When both Conditions and Activities are set up, enable the workflow to run. To do this, select Enable.

